HOW TO DIGITIZE A LOGO – STEP BY STEP GUIDE
Table Of Content
- Why Logo Digitizing Matters?
- Common Types of Stitches in Logo Digitizing
- Step-by-Step Logo Digitizing Process
- 1. Insert Your Logo into Digitizing Software
- 2. Set the Embroidery Size
- 3. Choose the Right Stitch Type
- 4. Define Stitching Directions
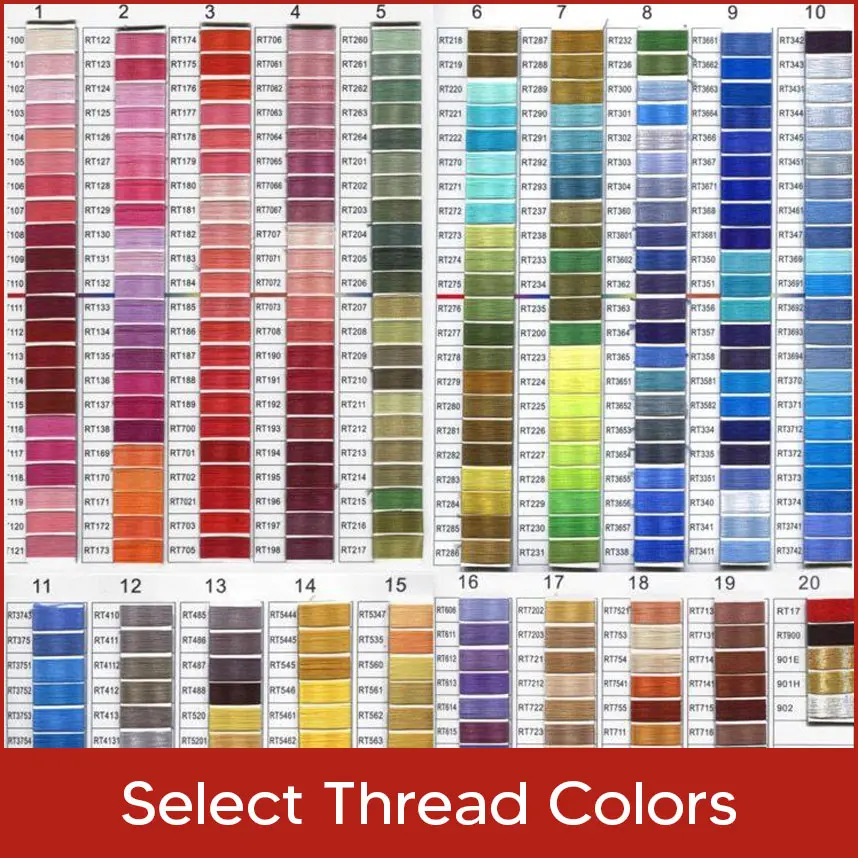
- 5. Select Thread Colors
- 6. Save and Transfer the File to Your Embroidery Machine
- 7. Prepare Your Embroidery Machine
- 8. Run a Test Stitch-Out
- Professional Digitizing Services in the USA
- Final Thoughts
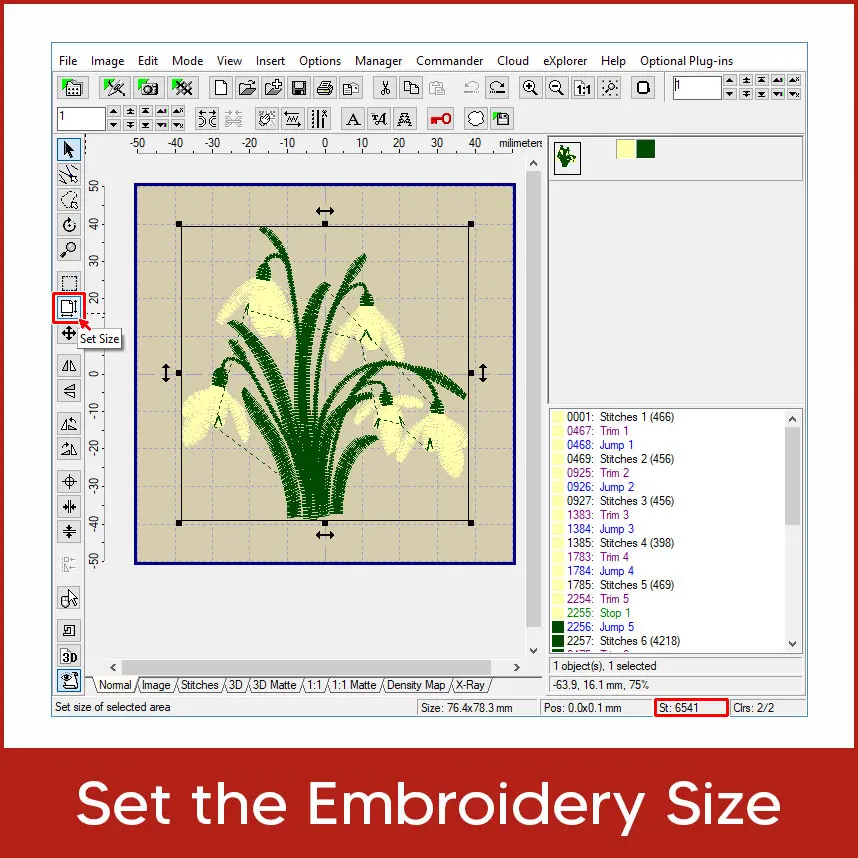
Digitizing a logo is the process of converting your brand’s design or icon into a stitch file that embroidery machines can read. This allows your logo to be embroidered on various fabrics, making it perfect for uniforms, caps,jackets, and promotional items. Whether you’re creating a design for business or personal use, digitizing ensures the final embroidered product looks sharp and professional. Corporate logos represent your brand identity, so they must be digitized with precision. Unlike computers, embroidery machines can’t read standard image formats like JPG or PNG. Instead, logos must be converted into special embroidery file formats (such as DST, EXP, or JEF) that machines can understand. A well-digitized logo not only looks accurate but also stitches efficiently without thread breaks or uneven patterns. Straight Stitch: Best for outlining, fine details & shading curved shapes. Satin Stitch: Often used for text, borders, and elements that require a glossy finish. Fill Stitch: Ideal for covering large areas, adding texture and increasing durability. Start by importing your logo file (JPG, PNG, etc.) into digitizing software. Crop unnecessary blank spaces to focus on the embroidery area. Measure the available embroidery space on your product and set the design dimensions accordingly. Once finalized, lock the size to maintain proportions. Select stitch types based on fabric type, design style, and the “push and pull” effect of embroidery. Each stitch type will affect the look and durability of the final product. Plan how the stitches will be placed. Proper stitch direction improves efficiency, reduces thread usage, and enhances the visual appeal of the embroidery. Match your embroidery thread colors to the exact Pantone shades of your brand for a consistent look. Export your design into a compatible embroidery format (DST, EXP, JEF, etc.) and transfer it using a USB, flash card or direct computer connection. Load the correct threads, set up needles, secure the fabric in the embroidery frame and position it in the machine. Make sure the correct sequence and orientation are set. Always embroider a sample before final production. Review the result, make necessary adjustments and retest until the logo meets your quality expectations. If you want to digitize your logo for business or personal use but don’t have the time or tools, Digitizing USA can help. We provide different types of custom embroidery digitizing services in the USA at very affordable prices, with fast turnaround times and exceptional quality. Whether you need a logo for uniforms, hats, jackets, or promotional products, our expert team ensures every stitch reflects your brand perfectly. Place your order today and get your logo digitized the right way. Digitizing a logo is essential for producing professional-quality embroidery. By following the right process and paying attention to stitch type, color matching, and machine setup, you can achieve flawless embroidered results. For a hassle-free experience and perfect designs, let the professionals handle it, your brand deserves nothing less.Why Logo Digitizing Matters?
Common Types of Stitches in Logo Digitizing
![]()
Step-by-Step Logo Digitizing Process
1. Insert Your Logo into Digitizing Software
![]()
2. Set the Embroidery Size
3. Choose the Right Stitch Type
4. Define Stitching Directions
5. Select Thread Colors
6. Save and Transfer the File to Your Embroidery Machine
7. Prepare Your Embroidery Machine
8. Run a Test Stitch-Out
Professional Digitizing Services in the USA
Final Thoughts